Come to your Backend. You have to be Logged in as Vendor.
Dashboard

In the Dashboard, you can easily see important info about your online shop and sales. Vendors get details about sales, orders. The breakdown of commissions is clear, making it easy to understand how much money is being earned, and helping to manage partnerships between marketplace operators and vendors effectively.
Media
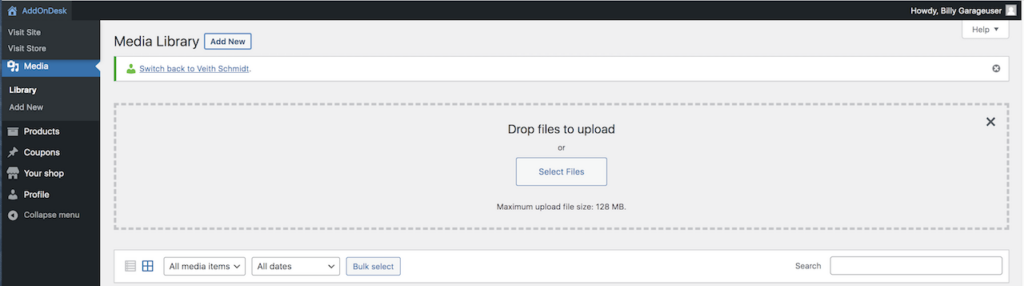
Within the Add-On-Desk Media section, users can efficiently handle images crucial for showcasing products in an online shop. This feature allows easy uploading, organization, and editing of product images. The Media Library’s user-friendly interface simplifies the process of managing visuals, ensuring a seamless integration of product pictures into various pages and posts on the website, ultimately enhancing the online shopping experience for customers.
To upload new images , simply click on “Add Image” and either drag and drop a photo into the highlighted area or choose a picture from your storage by selecting “Select Image.” This user-friendly process makes it straightforward for online shop owners to effortlessly add and manage product images, enhancing the visual appeal of their products for potential customers.

When you make pictures for your products in Add-On-Desk, keep them square and not too big, around 800×800 pixels is good. Save them as JPG or PNG. Make sure the pictures clearly show what your product is about, so customers can understand it easily. Following these simple steps will make your product images look nice and help people shop on your website.
We also suggest using a structured naming system for the uploaded images. Include the product name, upload date, and a numbering sequence. This helps keep things organized, making it easier to find specific product images when you need them. Consistent and clear names for your images contribute to a well-organized media library for your Online Shop. It ia also possible to upload PDF data for later use in the product desription.
Products
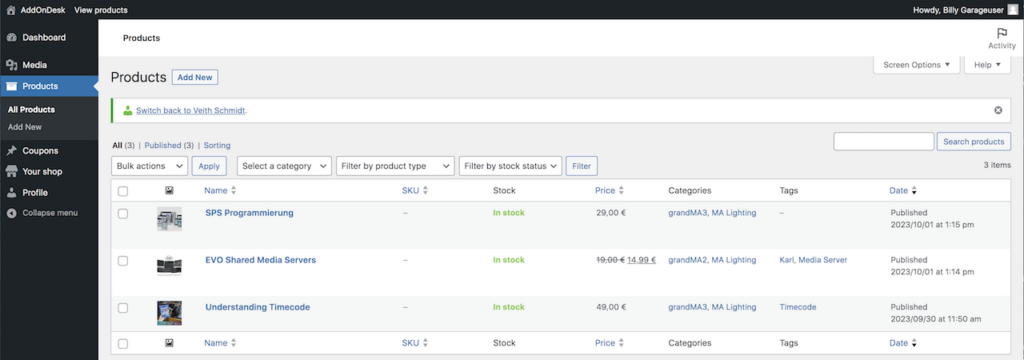
To upload products using the Add-On-Desk platform, go to the dashboard and select “Add Product.” Fill in the product details, such as name and price. Then, upload clear images, and don’t forget to click “Publish.” It’s that simple to showcase and sell your products online with Add-On-Desk!
Before products go online, the administrator checks them to make sure they meet the platform’s rules and are good to show to customers.
About your product
It’s really important that the product you’re sending out has been carefully checked and is in good working condition. Before you send it, please package the product as a .zip file, and make sure this compressed file includes the following essential components:
- The actual product: This refers to the main application or core item that customers have purchased.
- An installation guide in PDF format: This guide shouldn’t just cover the steps for installing the product; it should also highlight any known issues or unique aspects of the product. This information is crucial for ensuring customers can smoothly set up and use the product.
- A PDF containing troubleshooting information: This file should outline potential problems or error messages that users might encounter during product usage. Additionally, it should provide solutions and guidance to empower customers to troubleshoot issues independently.
- Preferably, information on how to contact the manufacturer: To offer continued support, consider including clear details on how customers can get in touch with you. This could include an email address, a dedicated support website, or other relevant contact information.
By providing this comprehensive set of information, you not only facilitate a successful installation and utilization of your product for customers but also ensure they have a clear pathway for seeking assistance if needed.
Name and Description
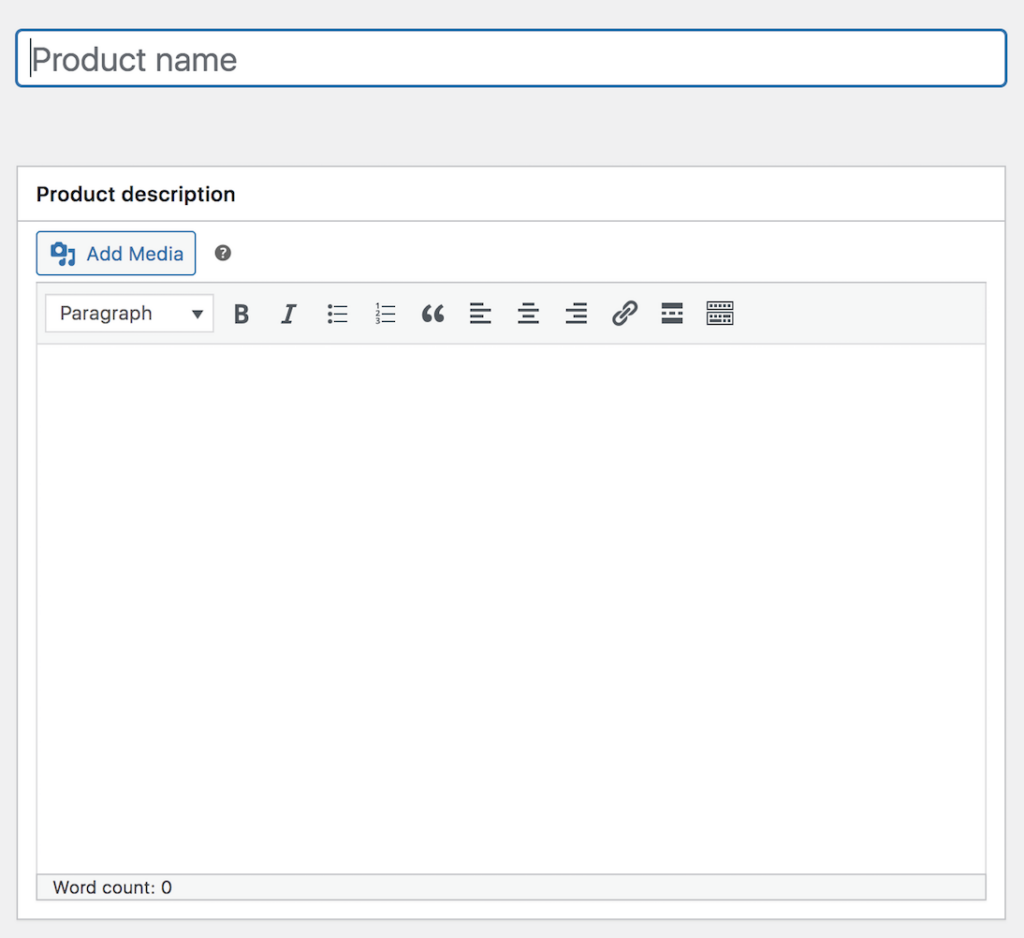
It’s important for the product to have a clear and not too long name that clearly describes its function.
The product description is like a friendly guide that explains exactly what the product does, so people can easily understand its purpose. Making it even more helpful, you can include pictures to visually show its features and how it works. If there’s a lot more to share, like detailed information or step-by-step instructions, you can upload longer descriptions or guides as PDFs. It’s a simple process – just click on “Add Media,” then choose the PDF from the “Media Library.” This way, users can effortlessly access additional details, making their experience more informative and enjoyable while getting to know the product.
Main Setting
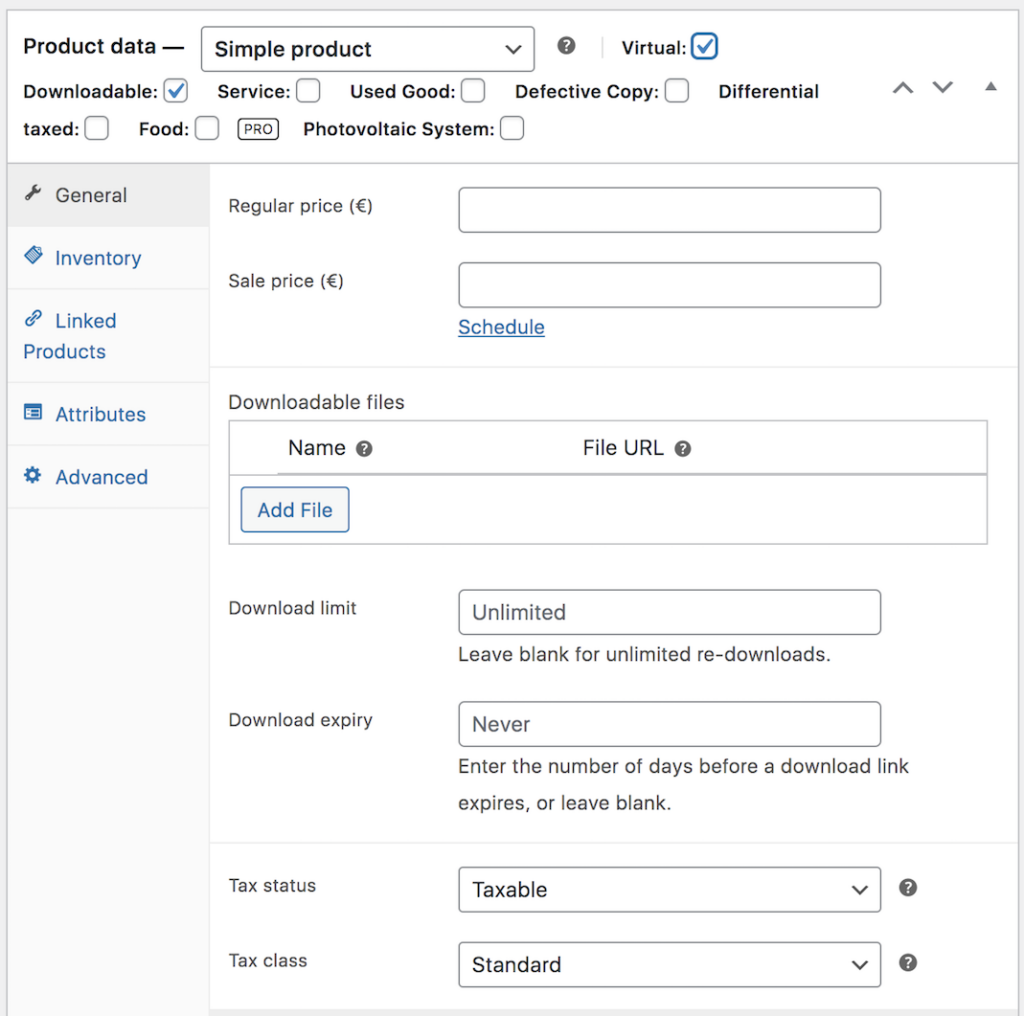
Pay attention to these settings because they’re the really important details.
Virtual: YES
Downloadable: YES
Regular price: Necessary
If you limit the number of downloads for a product, this must be mentioned in the product description.
Downloadable files: Klick “Add File” …”Choose file“…”Upload files“…Choose your file and Press “Insert file URL“.
You can give a Name.

Make sure that your product has been compressed as a *.ZIP file before you upload it.

We can only show a “Sale price” if a few things happen: the product has to be at the regular price for at least three weeks first. Then, it can be on sale for a max of four weeks. Also, during the sale, it can’t be sold anywhere else for the same or a lower price. These rules make sure that when we say something’s on sale, it’s fair and honest for everyone.
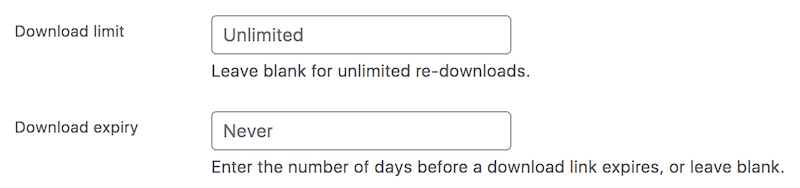
It’s a good idea not to limit how many times people can download or for how long. But if there are any limits set, like how many times you can download or for how long, it needs to be very, very clear in the product description. We want to make sure customers know exactly how they can use the product, and if there are any restrictions, we want to tell them in a way that’s easy to understand.

Since the shop is located in Germany, all products are subject to taxation.
Don’t Touch these settings.
Don’t touch these settings
Price Label
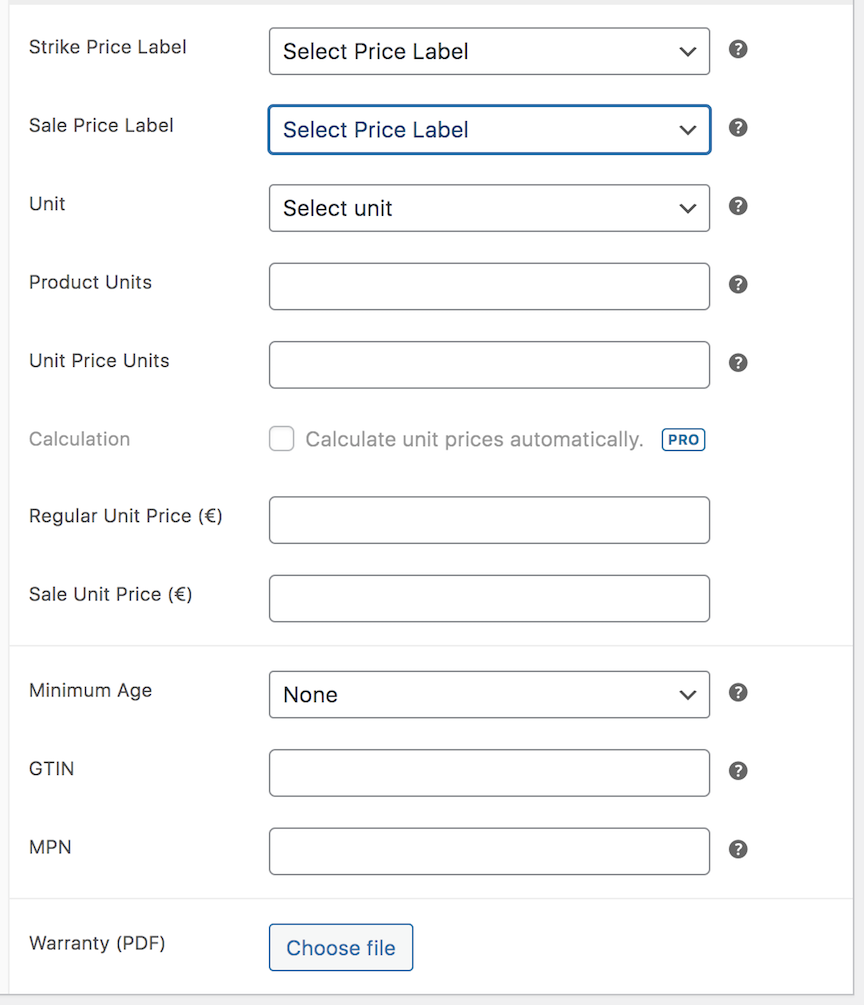
In our shop, we don’t use price labels, so there shouldn’t be any modifications made to them.
Don’t touch it.
Short / Cart Description

Feel free to write a little bit about your product in this space. People will see this “short description” when they look at your product in the Marketplace or your own online shop. It’s good to keep it short, using less than 100 letters, and it’s better not to include pictures here. This helps customers quickly understand what your product is about without too much extra stuff.

You can provide a brief description for your product in the “Cart Description,” which shoppers will see in their cart after adding the product. Please keep it short, using fewer than 100 letters, and it’s better not to include pictures. This helps customers quickly recognize and remember the product in their shopping cart.
Image
Upload a Product Image. It’s the first thing customers see, like a first impression. Make it clear and attractive to build trust and make customers want to buy.
The Product gallery is like a collection of pictures, including screenshots, for your product. You can add several images here to show different views and details. This is important because it gives customers a comprehensive understanding of your product.
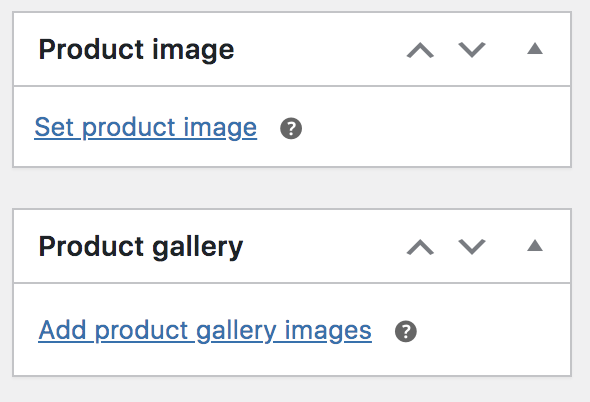
When taking product images, remember the technical details. Make them square, with a max size of 800×800 pixels and in PNG or JPG format. Following these guidelines ensures that your pictures look great and clearly show your product’s technical features. Be sure to follow these rules to make sure your product photos look attractive and informative.
Categorie / Tag
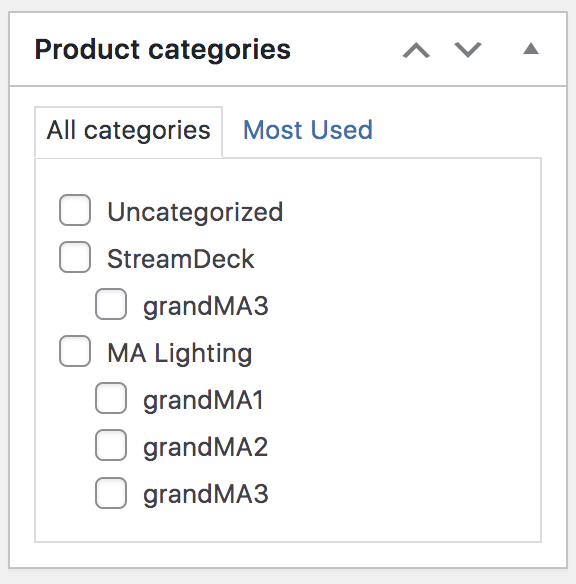
When picking a “Product Category,” start by choosing the manufacturer of your product, and then pick the specific product line.
Please acknowledge that uncategorized products cannot be considered.
If you don’t see a category you need, just let us know, and the platform manager will add it for you. This way, we make sure your products are neatly organized and easy for customers to find.
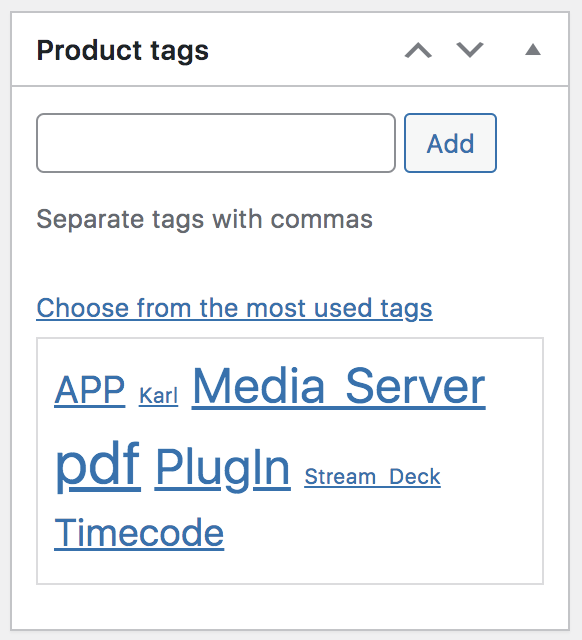
Please pay attention to the following very important points. when using tags:
- Keep it to 3 tags: Use only up to 3 tags for each product. This makes things clear and not too busy.
- Pick from the list: Click on “Choose from the most used tags” to pick tags from the list. It helps keep things organized and easy to find.
- Tell us if tags are missing: If you don’t see a tag you need, tell the platform manager. Don’t add your own tags. This makes sure everything stays organized and works well for everyone.
Publish
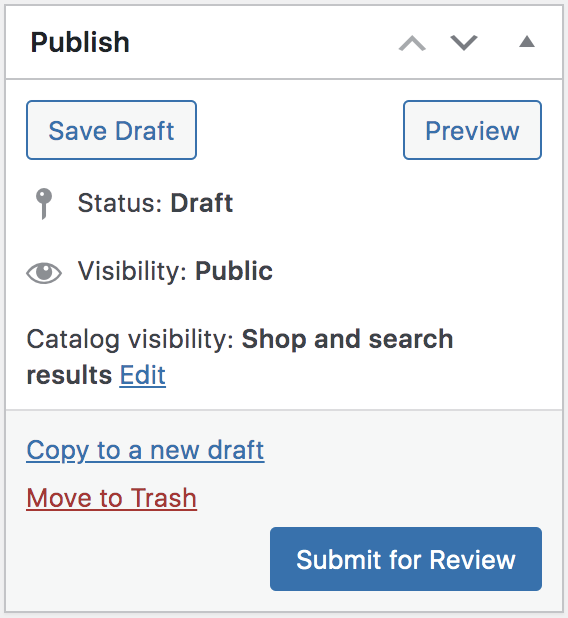
To get your product online the shop, here’s what you do: Press “Submit for Review” so the Admin of the platform can look at your product. After they check it, your product will be all set to be sold in the shop. Just remember, this whole process could take up to 48 hours, so be patient.
It’s important to note that any changes to any of the product features will temporarily remove the product from being available for sale. Only after a reevaluation by the platform manager will the product be made available again. Please be mindful of this, ensuring that all modifications undergo careful review to maintain quality and alignment with platform standards.
Coupons
Welcome to the world of savings! We’re all about great deals and discounts, and now you can bring that to your Add-On-Desk store too. Our easy-to-use coupons make shopping a real delight for your customers.
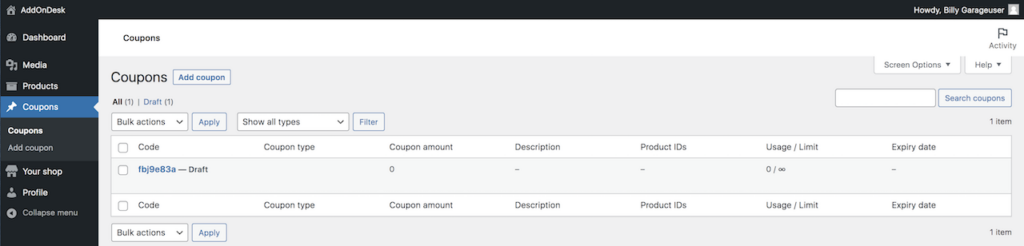
To create coupons using the Add-On-Desk platform, go to the dashboard and select “Add Coupon.” Fill in the coupon details, such code and value. And don’t forget to click “Publish.” It’s that simple to showcase and sell your products online with Add-On-Desk!
The created coupons are designed to work only for your own products. This ensures that the coupons are tailored specifically to your items, and using them for other products is not possible. This targeted approach allows for precise control and promotion of your own product line through the coupons, maximizing the effectiveness and benefits of your promotional efforts.
About Coupons
Why Use Coupons?
1. Build Customer Connections:
Coupons are a great way to strengthen your bond with customers. Offering regular deals makes customers feel valued and keeps them coming back to your shop.
2. Boost Sales:
Attract new customers and increase your sales with tempting discounts. People love to save, and coupons are an effective way to encourage them to make a purchase.
3. Improve Product Visibility:
Use coupons to promote specific products and optimize your inventory. This is especially helpful for selling seasonal items or making room for new products.
Tips for Successful Coupon Campaigns:
- Clearly Communicate Terms: Ensure your customers understand the coupon terms to avoid misunderstandings.
- Use Social Media: Share your coupon offers on social platforms to increase your reach.
- Emphasize Limited Availability: Create urgency by highlighting that the offer is for a limited time.
- Segment Your Audience: Target coupons specifically to different customer groups to increase relevance.
Get ready to boost your sales and make customers happy! Start today with coupon offers in your Add-On-Desk store.
Coupon Code and Name

In this section, you have the choice to either make up the coupon code by yourself, or you can let the system come up with one automatically generated.
We also suggest adding a description to the coupon. This is like a little note that helps you remember what the coupon is for or any specific details about its use.
General Setting
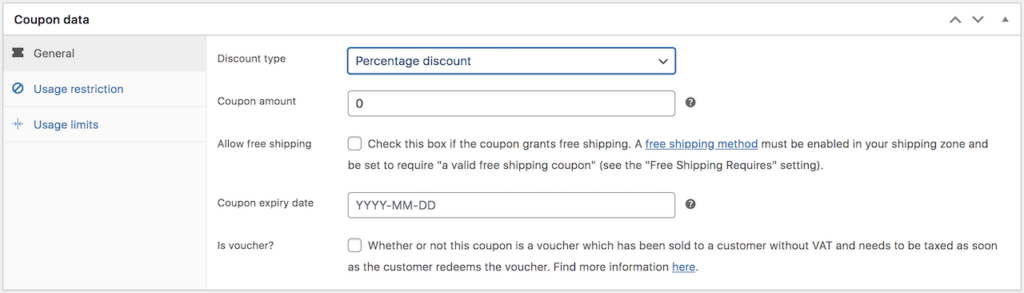
Discount Types in Add-On-Desk Coupons:
- Percentage Discount: This type reduces the total cost by a percentage. For example, a 10% discount on a $50 item would save the customer $5.
- Fixed Product Discount: Similar to fixed cart discount, this type applies a fixed reduction but only to specific products. Useful for promoting individual items.
The Coupon Amount refers to the specific value or percentage that a coupon provides as a discount to the customer during a purchase.
- Percentage Amount: Opting for a percentage amount applies a discount based on the total cost of the items in the cart. A 15% percentage amount on a $50 purchase results in a $7.50 discount.
- Fixed Amount: If you choose a fixed amount, customers receive a set discount regardless of their total purchase. For instance, a $10 fixed amount coupon deducts $10 from the total cost.
Allow free shiping: We offer only Downloadebel Products on our Marketplace. Don’t touch these
The Coupon Expire Date is the date on which a coupon code becomes invalid and can no longer be used by customers. Adding an expiration date to your coupons is a useful way to create a sense of urgency and drive prompt customer action.
Is voucher? means checking this box only if you are selling the coupon. Otherwise, you will need to pay taxes. Don’t touch these
Usage Restriction
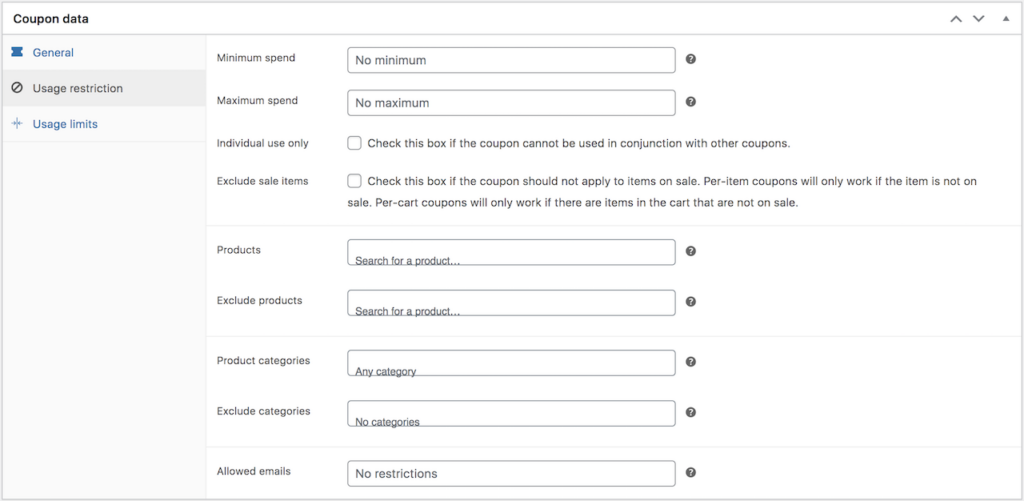
Minimum Spend and Maximum Spend:
- Minimum Spend: The “Minimum Spend” requirement ensures that customers need to spend at least a specified amount to be eligible for the coupon discount. For example, if the minimum spend is set at $50, the coupon will only apply if the customer’s cart reaches or exceeds that amount.
- Maximum Spend: On the other hand, the “Maximum Spend” limit allows you to cap the total purchase amount eligible for the coupon discount. If you set a maximum spend of $200, the coupon will not apply if the customer’s cart exceeds this limit.
These features offer a flexible way to tailor your promotions. For instance, you can encourage customers to spend more by offering a discount only on purchases above a certain threshold. Alternatively, you can limit the coupon to specific ranges to control your budget or align with marketing strategies.
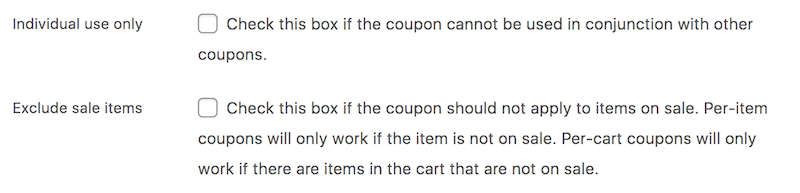
Individual use only: We recommend activating this option to ensure that discounts are not unintentionally duplicated. By activating this box, you help avoid situations where discounts overlap or stack unnecessarily, providing a smoother and more controlled experience for both the customers and the store management.
Exclude sale items: We recommend activating this option to ensure that discounts are not unintentionally duplicated. By activating this box, you help avoid situations where discounts overlap or stack unnecessarily, providing a smoother and more controlled experience for both the customers and the store management.

Products and Exclude Products:
- Products: With the “Products” option, you can specify which products the coupon is applicable to. By selecting specific products, you tailor the discount to a particular range within your inventory. For instance, if you’re running a promotion on a specific product line, you can ensure the coupon only affects those chosen items.
- Exclude Products: On the other hand, “Exclude Products” allows you to pinpoint items that should not be included in the coupon offer. This is useful when you want to apply a store-wide discount but exclude certain products from the promotion. For example, if there are items already on sale, you might choose to exclude them from additional coupon discounts.
By strategically utilizing the “Products” and “Exclude Products” options, you gain granular control over where your coupons apply and where they don’t. This level of precision enhances your marketing strategy, allowing for targeted promotions and a more tailored approach to discount distribution on your Add-On-Desk platform.

Product Categories and Exclude Categories:
- Product Categories: The “Product Categories” option enables you to designate which product categories the coupon is valid for. This means you can apply discounts to specific groups of products that share common characteristics. For example, if you want to promote all items in the “Electronics” category, you can ensure the coupon only affects products within that specific category.
- Exclude Categories: Conversely, “Exclude Categories” allows you to specify which product categories should not be included in the coupon offer. This is useful when you want to provide a store-wide discount but exclude certain types of products. For instance, if certain categories are already on sale, you might choose to exclude them from additional coupon discounts.
By utilizing the “Product Categories” and “Exclude Categories” options, you gain precise control over where your coupons apply and where they don’t. This level of flexibility enhances your ability to run targeted promotions, ensuring your discounts align seamlessly with your overall marketing strategy on your Add-On-Desk platform.

Allowed Emails: The “Allowed Emails” option allows you to specify which email addresses can use the coupon. By adding specific email addresses to this list, you ensure that the discount is accessible only to customers associated with those emails. This can be particularly handy for targeted promotions or exclusive offers to a specific group of customers.
Usage Limits

The “Usage Limits” section empowers you with tools to manage how your coupons are utilized. This section includes important features such as “Usage Limit per Coupon,” “Limit Usage to X Items,” and “Usage Limit per User.”
- Usage Limit per Coupon: The “Usage Limit per Coupon” setting allows you to define the maximum number of times a specific coupon can be used overall. Once this limit is reached, the coupon becomes invalid, preventing further redemptions.
- Limit Usage to X Items: With “Limit Usage to X Items,” you can restrict the coupon to be applied only to a specified quantity of items in the cart. For example, if you set the limit to 3 items, the coupon discount will apply only to the first 3 eligible items in the customer’s cart.
- Usage Limit per User: “Usage Limit per User” empowers you to set a maximum number of times an individual customer can use the coupon. This is particularly useful for creating a sense of exclusivity or preventing abuse of discounts by limiting each customer’s usage. We suggest letting each person use a coupon only one time. This is to make things fair and avoid any problems. It means everyone gets a chance to use the coupon, and it keeps everything simple and fair for all customers.
These usage limit features offer a comprehensive way to control the distribution and impact of your coupons. Whether you want to limit overall usage, cap the number of items eligible for a discount, or control how frequently individual customers can benefit, the Usage Limits options in WooCommerce provide a flexible and strategic approach to your coupon management.
Publish
When you’re ready to make your coupon you have to Publish it.
- Status:
The “Status” option indicates whether your coupon is active or not. If you’re ready for customers to start using the coupon, set the status to “Published.” If you need more time to configure or want to save it for later, you can choose “Draft” to keep it unpublished. - Visibility:
“Visibility” determines who can see your coupon. Select “Public” if you want it to be visible to everyone, or choose “Private” if you want to restrict access to specific users. This allows for targeted promotions or exclusive offers. - Published On:
“Published On” lets you schedule when the coupon becomes active. If you have a specific start date for your promotion, you can set it here. This is particularly useful for timed sales events or marketing campaigns.
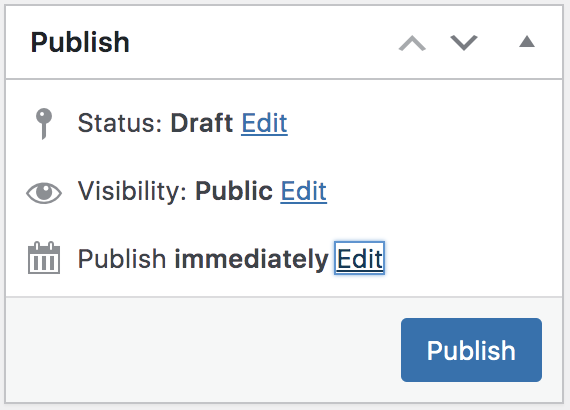
To publish your coupon, set the status to “Published,” choose the appropriate visibility, and if needed, specify the date and time it should become active using “Published On.” Click “Save Changes” to make your coupon live and ready for customers to enjoy. These settings give you control over when, where, and how your coupon is presented on your Add-On-Desk store.
Your Shop
In the big world Add-On-Desl “Your Shop” is super important setup area, especially if you want to rock it on. Your account settings, like payment methods and security details, are also managed in “Your Shop.” This is where you make sure your customers have reliable and secure payment options and that your account information is up to date. It’s like your control center for keeping everything in check. This is where you do the basic stuff to make your shop cool and decide how it looks.
About Your Shop

In the Add-On-Desk Marketplace, vendors have the opportunity to establish their own unique shops by signing up as sellers. Upon registration, vendors gain access to a personalized space where they can shape their shop according to their brand identity. This includes customization options such as incorporating information about their business, connecting social media accounts, and creating a distinctive shop design.
Within their individual shops, vendors can showcase and feature all of their products, offering customers a comprehensive view of their offerings. The shop becomes a centralized hub where vendors can present their products in an appealing and organized manner, enhancing the overall shopping experience for potential customers.
Importantly, each vendor is provided with a unique shop link that directs customers straight to their personalized store. This link serves as a direct pathway for customers to explore the vendor’s entire product catalog and engage with their brand. In English: Simply go to “Service” … “Vendors” and then to “Your Shop.” Copy the link from your browser and share it with your customers.
By allowing vendors to create and personalize their own shops within the Add-On-Desk Marketplace, the platform not only promotes individual branding but also facilitates a seamless connection between sellers and customers. This approach empowers vendors to establish a distinctive online presence, making it easier for customers to discover, engage, and make purchases directly from their shops.
Dashboard

The Vendor Dashboard provides an overview of your shop’s performance. Track sales, monitor customer activity, and get insights into what’s working well. It’s your virtual window into how your shop is doing in the marketplace.
Gain financial insights right from your dashboard. Track earnings, view transaction details, and manage your financial records. This feature ensures you stay on top of your shop’s financial health.
Commisions

The “Commission List” in the Add-On-Desk Marketplace is a crucial tool for vendors in Commisions. It provides a clear overview of earned commissions, offers detailed insights into transactions, and facilitates financial planning. This tool goes beyond past transactions, serving as a valuable resource for vendors to understand product performance and strategically plan future offerings. With a user-friendly interface, it ensures easy access to financial information. Acting as a financial compass, the “Commission List” empowers vendors to manage, optimize, and work toward sustainable success in the Add-On-Desk Marketplace. Regular reviews enable vendors to adapt their strategies, enhancing profitability.
Store Settings
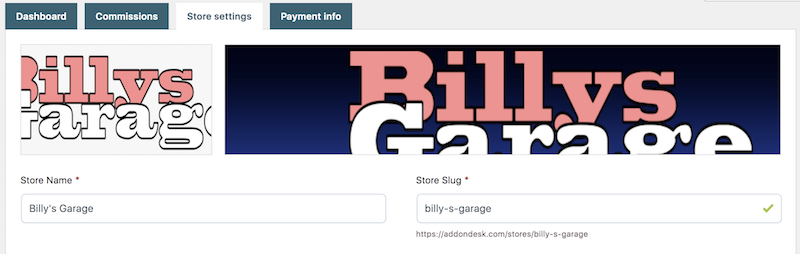
Create your shop’s identity! Upload your logo and a shop banner. Keep in mind that the logo shouldn’t be larger than 512 x 512 pixels, while the banner should have a size of 1100 x 460 pixels. This is where you give your shop its name. Remember, the name you choose is important!
In a URL, the “slug” is the part that comes after the domain and identifies a specific page or post. For example, in the URL “www.addondeskcom/shop/my-nice-shop,” the “my-nice-shop” is the slug, pointing to that specific article. Slugs are derived from titles for clarity and user-friendliness in web addresses.

In this part, you need to put in the important details about your business. Make sure you fill in all the blanks, except for the ones about your website. We take good care of this info and follow privacy rules. Your details won’t be given to customers; we only use them for sorting out payments between Add-On-Desk and you. If anything changes in your info, you have to let us know right here. If you don’t give us all the info we need, you won’t be able to sell products on the marketplace.

Share a brief but detailed description about yourself, your business, or your shop. This information will be showcased in various sections across the platform, giving customers a better understanding of who you are and what your business is all about. It’s a great way to build trust and connect with potential buyers, as they get valuable insights that can influence their decision to engage with your shop.
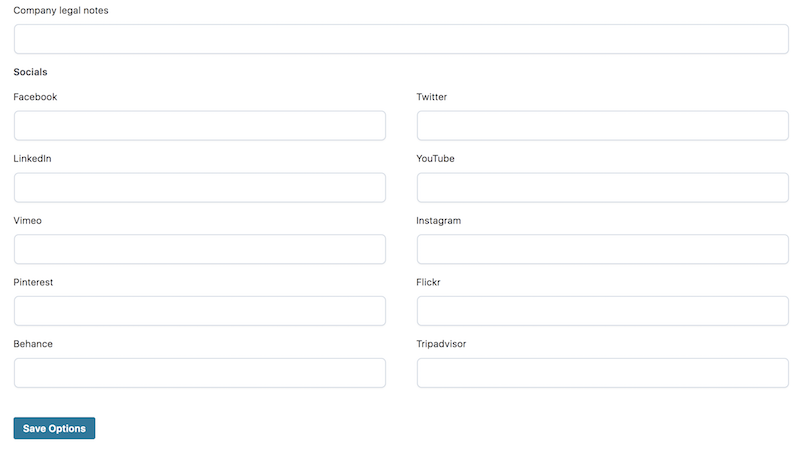
Here, you have the opportunity to provide information about your social media channels. This is crucial because visibility in our online shop is highly beneficial for your business. By linking to social media platforms, you can reach a broader audience and directly engage with customers. This not only enhances your visibility but also builds trust with customers, potentially positively impacting your business success.
Remember to click on the ‘Save Options‘ button at the end of your entries. If you forget to do this, the information you just provided will not be saved, and you may lose all the details you’ve entered.
Payment Info
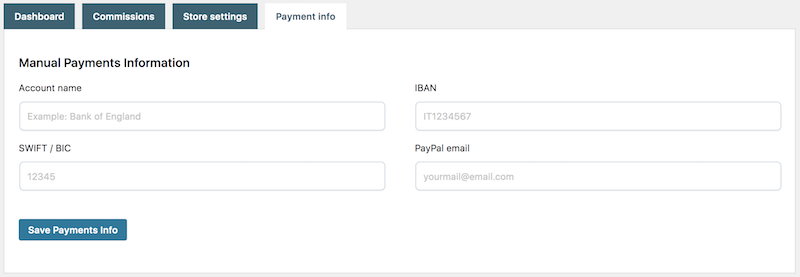
Please provide your PayPal account here. We exclusively use PayPal for commission payouts. Billing is done at the end of the month for the commissions from the previous month. For instance, you’ll receive your January commission statement at the end of February. This is because customers have a 14-day return window, and it allows time for any potential issues to be addressed before payouts are processed.
Profile
The user profile in WordPress is the personal space where each user can manage their individual settings and information. Users can upload profile pictures, update personal details, and customize settings for display and interaction with the website. So, the user profile serves as a digital business card for individuals on the Add-On-Desk platform.
Frequently asked questions
Product Upload
hkh
Why isn’t the product preview showing up right?
- You are not able to sell as a vendor because the administrator has not yet approved your access or you have not confirmed the Terms and Conditions.
leere frage
neues Thema
hkh
leere frage
leere frage
